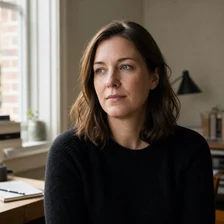
ChatMore turns photo editing into a conversational workflow on iPhone. Start with a photo you already have, describe the result you need, protect the details that matter, and refine one issue at a time.
This guide covers the full start-to-finish process. Use the AI photo editor page for product capability, the background guide for one specific transformation, and the prompt library when you need copyable edit instructions.
Start with the photo and its job
Choose a source image where the main subject is visible and the area you want to change is not heavily cropped. Then define where the result will be used: profile image, product visual, social post, background replacement, creative concept, or presentation.
The job determines the edit. A profile image needs recognizable facial details and a useful crop. A product visual needs consistent shape, materials, shadows, and empty space. A social image may need a stronger focal point and room for copy.
- Pick the clearest available source image.
- Name one primary use for the finished photo.
- List details that must remain unchanged.
- Choose one first edit instead of changing everything.
An example brief
- 01 · InputBring context
The original mug photograph shown below
- 02 · RequestAsk a focused question
Change only the wall colour; preserve the mug, handle, tabletop, light, and crop.
- 03 · CheckReview the result
Compare both images at the same scale and inspect the handle and contact shadow.
Original

Background edit

Follow a five-step AI photo-editing workflow
A controlled sequence makes results easier to judge. Do not combine a new background, outfit, hairstyle, crop, lighting direction, and text treatment in one first request.
Work from broad decision to small correction, keeping the strongest version as your reference.
- Upload the source photo and describe what is visible.
- State one change plus the details that must stay untouched.
- Generate a version and compare it with the source.
- Refine one problem: edges, lighting, scale, color, crop, or realism.
- Check the final output at full size before saving, sharing, or publishing.
Example workflow
Prompt: edit this photo for a professional profile image. Replace the busy background with a soft neutral studio setting. Preserve facial features, expression, skin tone, hairstyle, clothes, pose, and body proportions. Match shadows and lighting to the new background.
Write an edit request with clear constraints
A useful edit request says what should change, what must stay the same, and what visual details should make the result believable. Specific constraints reduce accidental changes.
For people, identify facial features, expression, skin tone, hair, pose, hands, clothes, and body proportions that need preserving. For objects or rooms, protect shape, labels, dimensions, doors, windows, camera angle, or other structural details.
- Change: subject, background, color, styling, lighting, or composition.
- Preserve: identity, pose, proportions, product shape, architecture, or camera angle.
- Match: perspective, shadows, reflections, depth, texture, and color temperature.
- Avoid: unwanted text, extra objects, distorted hands, duplicate features, or unrelated scene changes.
Compare the result before refining
Look at the edited image beside the source. First check whether the requested change is clear. Then inspect important preserved details and the transition between changed and unchanged areas.
If a result is close, change one variable. Ask for softer lighting, cleaner hair edges, a simpler background, more natural shadows, or the original crop. One focused revision makes it easier to learn what improved the image.
Example workflow
Review prompt: compare this edit with the original. List changes to identity, hands, edges, text, product shape, perspective, shadows, reflections, and lighting. Recommend one correction prompt only.
Create AI image styles on iPhone
Attach a photo in ChatMore and describe the style through look, light, color, and texture. State what must remain unchanged, generate one direction at a time, and compare every version with the original.
For a new image, describe subject, setting, composition, and style. For a photo edit, protect subject, pose, crop, and important details. Style edits can still alter faces, hands, text, or small objects, so inspect the result before sharing.
AI style editing is different from Apple's Photographic Styles. Camera styles adjust supported iPhone photos; ChatMore style prompts generate or edit an image from written instructions.
- Name one style family, such as editorial portrait, soft watercolor, graphic poster, or muted film-inspired color.
- Add palette, contrast, texture, and lighting details.
- State what to preserve: subject, pose, crop, layout, or readable text.
- Keep the original and inspect every generated version.
Example workflow
Prompt: keep the person, pose, crop, and background layout unchanged. Rework only the color treatment into a muted editorial look with soft window light, warm neutrals, gentle contrast, and natural skin tones. Do not add text or new objects.
Use the right ChatMore photo workflow
Use the full ChatMore AI photo editor when you want to transform an existing image. Use the background-change guide for a focused replacement workflow. Open the photo-editing prompt library when you need reusable instructions for backgrounds, hairstyles, outfits, accessories, rooms, or concepts.
If no source photo exists and you want a new scene from scratch, use image generation instead of forcing an edit workflow.
Check the final photo before using it
Generated edits are interpretations, not guaranteed accurate previews. Zoom in and check facial identity, hands, edges, text, logos, product details, reflections, shadows, scale, and perspective.
Verify rights, consent, sensitive details, and platform requirements for the intended use. Rebuild important text in a design tool rather than assuming generated lettering is correct.
Prompts to try
Edit this photo for [use]. Change [one element]. Preserve [identity, pose, proportions, clothes, product shape, or architecture]. Match perspective, lighting, shadows, and reflections.
Replace the background with [setting]. Keep the subject recognizable and unchanged. Preserve natural hair edges and match the new environment's light and depth.
Improve this product photo with a clean [background], balanced studio lighting, realistic shadows, and empty space for a headline. Do not change product shape, color, labels, or proportions.
Create a polished social crop from this photo. Keep the main subject clear, leave space for copy, and avoid adding text or logos.
Compare this edit with the original. Identify unwanted changes to identity, hands, edges, text, proportions, lighting, shadows, reflections, or perspective.
Keep the current image and fix only [problem]. Do not change any other part of the subject, background, crop, color, or lighting.
Edit this photo into a muted editorial portrait. Preserve the person, pose, crop, facial features, clothing, and background layout. Change only the palette, light, and contrast.
Turn this photo into a restrained watercolor illustration with loose edges, paper texture, and a limited [color palette]. Preserve the main subject and composition.
Create three style variations of this image. Keep subject and crop consistent, then list intended changes and details that may have changed.
Quick checklist
- Define where the finished photo will be used.
- Request one primary change at a time.
- State which details must remain unchanged.
- Compare each result with the source image.
- Check identity, edges, text, lighting, scale, and rights before use.
- Keep the source photo before testing style variations.
- Separate AI style edits from iPhone camera Photographic Styles.
Try the workflow on your iPhone.
Open ChatMore with a question, a draft, or a screenshot. Check the result, then refine it for your task.
Download ChatMoreCommon questions
Can I edit an existing photo with AI on iPhone?
Yes. In ChatMore, start with a source photo, describe one change, identify details that must stay unchanged, then compare and refine the generated result.
How do I stop AI from changing the person?
Ask ChatMore to preserve facial features, expression, skin tone, hairstyle, pose, clothes, hands, and body proportions. Generated edits can still vary, so compare every result with the source.
Should I use photo editing or image generation?
Use photo editing when an existing image must remain the foundation. Use image generation when you want a new visual from a text prompt without preserving a source photo.
Are AI image styles the same as iPhone Photographic Styles?
No. Photographic Styles are iPhone camera controls on supported models. An AI style prompt asks ChatMore to generate or edit an image from a written description.
Sources and product details
ChatMore publishes this guide. Product features, availability, limits, and prices can change; consult the current official information before choosing a plan.
- ChatMore on the App Store
- Apple: Use Photographic Styles with iPhone camera